Plantain Cracker-Chips
Nothing like trying out new recipes on a few hundred people…
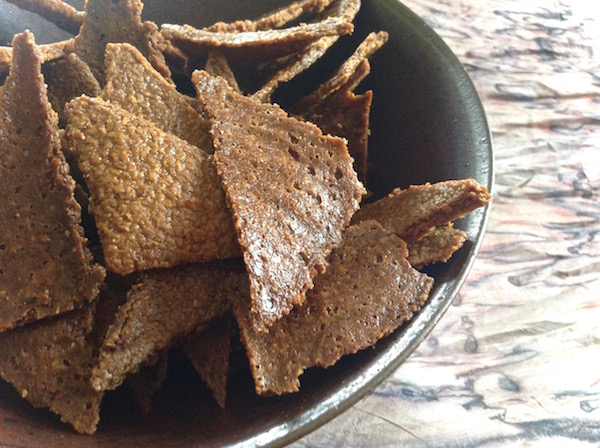
There was a request for plantains at a large graduation party a couple of weeks ago. I’ve made simple chips before by slicing the starchy fruit and either frying or baking the cute seasoned circles as a side dish. A friend recommended I try these which were a whole new territory and more like a cracker. The recipe she sent to me is from the blog Paleo Mom, and I of course tinkered and added more spices. They are best right out of the oven but I also stored them for two days in an air tight container then re-crisped them in the oven for about 15 minutes the day they were served. The color is surprisingly dark, almost like a blue corn chip, but the flavor and crunch is great for a mango salsa.
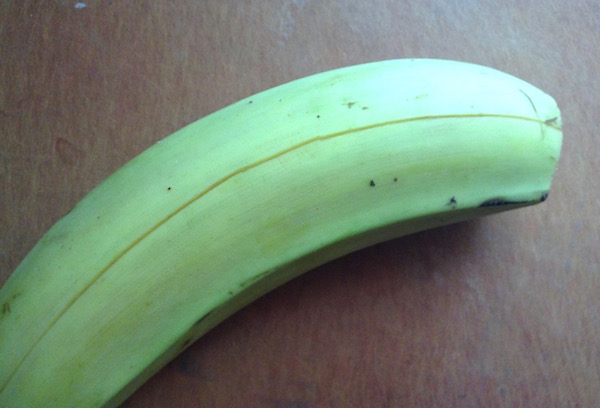
Plantains are the drier and starchier cousin of the banana that require being baked or fried before eating and people love them both green and ripe. Green plantains are easier to work with because they are less sticky and they have a good flavor, and as the peel turns brown or black it’s indicative of the ripening and sweetening of the plantains inside.
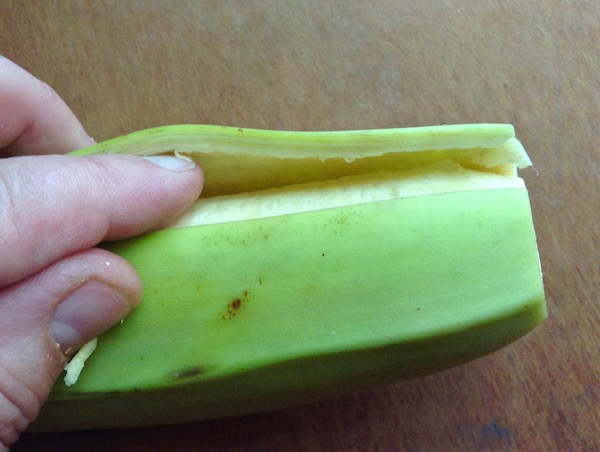
The skin of the plantain is thicker than a banana and takes a little work to remove. Make three skin-deep slits lengthwise along the skin, then work your finger underneath the skin and sideways along the slit to help loosen the skin from the fruit. The skin becomes easier to remove as it ripens. Some people say to store the peeled fruit in saltwater until you’re ready to use to reduce discoloration, but I didn’t do this.

This is the hummus-like puree spread out about 1/8 inch thick onto a sheet pan lined with PARCHMENT paper.
Let me repeat: Parchment Paper.
The saddest part of the process was when I substituted wax paper for the parchment on the baking pans. I have used wax paper successfully in other projects that called for parchment…but not this time. I didn’t realize how badly it sticks to the wax paper until after the baking process so I lost three batches of chips because they would not peel away from the paper. Sigh. Let my experiment help you not go down that little path.
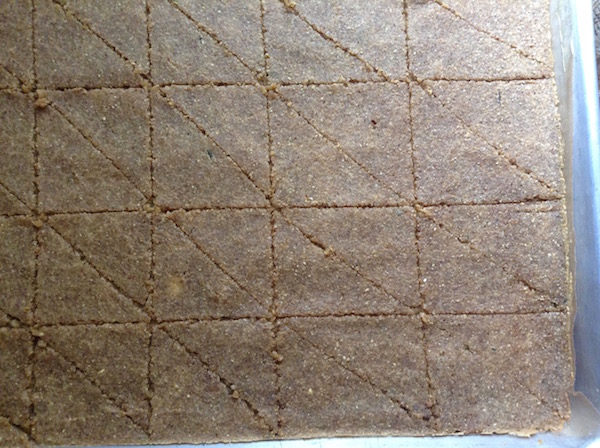
It’s recommended to bake the chips 5-8 minutes, then remove the pan from the oven and slice whatever shape you want for your chip/cracker. This partially baked batter is a little more firm and will retain the cuts better. Then begins the long slow process of the baking which is almost more of a dehydration. I left these in for over an hour, and then crisped them up for 15 minutes when I served them two days later.
Plantain Cracker-Chips
Prep Time: 20 minutes
Bake Time: 60-90 minutes
Line a cookie sheet or a jelly roll pan with parchment paper —NOT wax paper!
Preheat oven to 300 degrees Fahrenheit.
Add to a food processor:
2 large Green Plantains, peeled and coarsely chopped
Pulse chop then blend for a minute or two.
Add:
1/2 cup Coconut Oil, melted
2 teaspoons Chili Powder
1 1/2 teaspoon Sea Salt
1/2 teaspoon Granulated Garlic
1/4 teaspoon Honey
1/8 teaspoon Lime Oil; or 1 teaspoons Lime Juice + 1 teaspoon Lime Zest, minced
Blend until smooth, similar consistency to hummus.
Spread the batter onto the cookie sheet or jelly roll pan lined with parchment paper. Use a spatula to spread it out evenly to about 1/8 inch thick.
Bake 5-8 minutes, then remove the pan and slice the crackers into squares or triangles.
Return pan to oven for another 60-80 minutes.
Crackers may be a bit chewy and leathery. Either continue baking, or store and crisp the crackers for 15 minutes in the oven before serving.
You may need to break apart some of the crackers after they have cooled.
Rest in Peace, Dan.
Wonderful photo, Ruthie; thank you for thinking of us…
There’s a Watership Down quote on the front page that fits the day.
LOVE the photo!!!
Alice was taking a photo of us and we decided to charge her! Circa 1982, or something like that.